Take A Factory Tour for Structural Insulated Panels
Ever wonder how SIPs are made? We were wondering how to make a SIP panel, as well. So Steve and I visited the structural insulated panel factory that supplies Crockett with their panels.

Our visit was really interesting, and I’ve captured some of the highlights of our visit to the R-Control structural insulated panels factory, below…
We were quite impressed with the quality control procedures and random, unannounced testing of the structural insulated panels at the factory.
Steve and I learned how to make a SIP at the factory. Here we are in front of a huge pile of structural insulated panels at the factory.
Here’s an Overview of How SIPs are Made
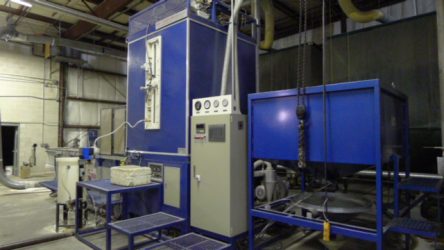
The first step is that tiny polystyrene beads are fed into the large machine that you see below. That’s where they are formed into large foam blocks.
This machine makes huge blocks of foam, which are then sliced to the appropriate thickness for the structural insulated panels being made.
The foam blocks are cut to be between 6” and 12”, depending on the R-value desired. For example, R-Control’s SIPs panels have these R ratings:
- 6 1.2” thick = R-24
- 8 ¼” thick = R-32
- 10” thick = R-40
- 12” thick = R-48
Custom Made Panels
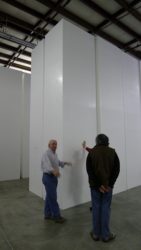
The foam slabs that will go between OSB boards are cut to length, anywhere from 4’ to 24’ long and they are usually 8’ high.
Crockett’s structural insulated panels are custom made for each house, so the size of the SIP panels will vary from home to home.
This shows you how big the foam blocks are, before they are cut to size. Learning how to make a SIP was fascinating, because it wasn’t as simple as we thought it would be.
These large block are then “sliced” to form foam pieces with the desired R-value.
They will be coated with glue and then sandwiched between OSB boards to make SIPs panels.
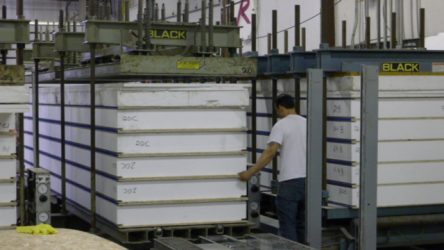
Stacks of structural insulated panels after they are glued with a special non-toxic and permanent glue.

Gluing the Pieces Together
After the structural insulated panels are glued together, they are stacked; and then a specific measured pressure is applied to the panels.
Pressure is applied evenly to all parts of the stack, and the pressure is applied for a specific time, to insure an all-over and permanent seal.
The pressure on the SIPs panels is measured with the gauges in the photo on the right.
The gauges insure that enough pressure is applied, yet not so much that the SIP panels are damaged. Pressure is applied until the glue has set and the parts will not separate.
Testing and Inspection of Structural Insulated Panels
While the process of how to make a SIP seemed really simple at first glance, we discovered that each part of the process is very precise and measured.
That’s because the SIP products have been treated and tested for:
- Strength and load bearing – short time and long duration
- Impact resistance – protection from flying objects during storms
- Resistance to high winds – resistant to wind, snow and earthquakes
- Insulation values
- Mold and mildew resistance and resistance to decay
- Condensation during summer and winter months
- Sound transmission – SIPs block noise
- Air infiltration
- Fire resistance – gases given off when burned are similar to those produced when wood is burned
- Termite protection – treated with Perform Guard
To keep their high ratings, the SIP factory uses consistent and very precise measurements and processes when making the structural insulated panels.
All the SIP panels need to be uniform and exactly alike. That requires careful monitoring of each process so that the finished products meet or exceed all the standards that they are tested for.
One thing that I found to be interesting is that the company that we visited conducts surprise inspections and testing at each of its factories. That keeps everyone in the structural insulated factories, on their toes!
SIPs panels are inspected during every stage of production. When learning how SIPs are made, we saw many inspections, performed by the workers in the factory.
